How to Pour a Concrete Slab Step by Step
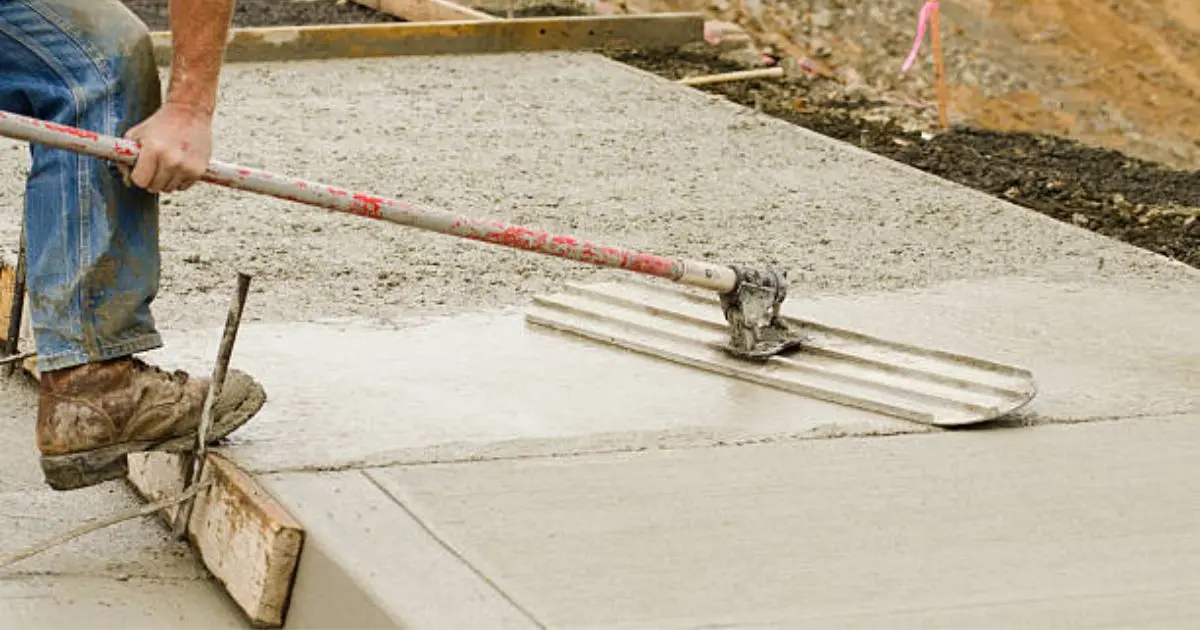
Table of Contents
Pouring a concrete slab involves 8 key steps. Prepare the site, build forms, add gravel base, place reinforcement, order and pour concrete, screed and level, finish the surface, and cure properly. A standard 4-inch residential slab uses 3,000 PSI concrete with #3 rebar at 18 inches on center and takes 1 to 3 days to install depending on size. Most slabs under 100 square feet are manageable DIY projects. Slabs over 100 square feet benefit from professional installation because concrete is unforgiving once it starts setting. This guide walks through every step of pouring a concrete slab in 2026.
Step 1: Plan the Slab Layout and Check Requirements
Start by determining the exact dimensions, thickness, and purpose of your concrete slab. A patio slab needs 4 inches of thickness. A garage floor needs 5 inches. A metal building foundation needs 5 to 6 inches with thickened edges. Marking out the slab footprint with stakes and string lines establishes the boundaries.
Check with your local building department about permit requirements. Many jurisdictions require permits for concrete slabs over a certain size (commonly 100 to 200 square feet) or for slabs that will support structures. Permit fees typically range from $50 to $500.
Calculate how many cubic yards of concrete you need. Multiply length (feet) times width (feet) times thickness (inches divided by 12), then divide by 27. A 20×20 slab at 4 inches thick requires 4.94 cubic yards. Order 5% to 10% extra to account for waste and uneven sub-grade. Under-ordering concrete is a far worse problem than over-ordering.
Step 2: Prepare the Site and Grade the Ground
Excavate the slab area to the proper depth. For a 4-inch slab with 4 inches of gravel base, excavate 8 inches below the desired finished surface height. Extend the excavation 6 inches beyond the slab edges on all sides to allow room for form boards.
The ground must be leveled, compacted, and clear of any obstructions. Remove all organic material including topsoil, grass, roots, and debris. Organic material decomposes and creates voids under the slab, leading to settlement and cracking.
Grade the excavated area with a slight slope for drainage. Exterior slabs should slope away from any adjacent structure at 1/8 inch per foot minimum. Use a long straight board and a level to check grade across the entire area. Fill low spots and compact them to match the surrounding grade.
Compact the native soil with a plate compactor or hand tamper. Loose, uncompacted soil is the number one cause of slab settlement. In clay-heavy soil regions, consider laying geotextile fabric over the compacted soil before adding gravel to prevent clay from migrating into the gravel base.
Step 3: Add Gravel Sub-Base and Compact
Spread 4 to 6 inches of clean crushed gravel or crushed stone over the compacted soil. The sub-base provides drainage underneath the slab and creates a uniform, stable surface for the concrete to rest on.
Compact the gravel in lifts of 2 to 3 inches. Add 2 inches, compact thoroughly with a plate compactor, then add the next 2 inches and compact again. The finished gravel surface should be firm enough that you do not leave footprints when walking on it.
The gravel sub-base should extend to the edges of the forms on all sides. Verify that the compacted gravel surface maintains the proper grade and drainage slope. Use a long screed board to check for high and low spots. A level, well-compacted gravel base makes the difference between a slab that lasts 30 years and one that cracks within 5 years.
Step 4: Build and Set the Forms
Forms define the edges of your concrete slab and hold the wet concrete in place during the pour. Standard form boards are 2×4 lumber (for 4-inch slabs) or 2×6 lumber (for 5 to 6 inch slabs) staked into the ground every 2 to 3 feet along the outside of the slab perimeter.
Drive wooden or metal stakes along the outside of the form boards and screw the forms to the stakes. The top edge of the form boards defines the finished surface height of the slab. Use a string line and level to set all form boards at the correct height with proper drainage slope.
Forms must be straight, level (or properly sloped), and strong enough to resist the pressure of wet concrete. A cubic yard of wet concrete weighs approximately 4,000 pounds. If forms bow or blow out during the pour, the concrete will be uneven and may flow beyond the intended slab area. Double-check all stakes and connections before pouring.
Apply form release oil or used motor oil to the inside faces of the form boards. This prevents the concrete from bonding to the wood and makes form removal easier after the concrete cures.
Step 5: Place Reinforcement
Reinforcement prevents cracking and holds the slab together. Standard #3 rebar (3/8 inch diameter) placed in a grid pattern at 18 inches on center is the most common reinforcement for residential concrete slabs. The rebar grid creates a network of steel inside the concrete that distributes stress and prevents cracks from spreading.
Place the rebar grid on rebar chairs or small concrete blocks (dobies) that hold the steel at the correct height within the slab. Rebar should sit at roughly the middle of the slab thickness. For a 4-inch slab, the rebar should be approximately 2 inches off the gravel base.
Tie rebar intersections with wire ties to keep the grid in position during the pour. The grid does not need to be tied at every intersection. Tying every other intersection is sufficient to maintain position.
Wire mesh (6×6 W2.9/W2.9 or equivalent) is an alternative to rebar for light-duty slabs like patios and walkways. Lay the mesh flat and elevate it on chairs so it sits in the middle of the slab. Wire mesh that sinks to the bottom during the pour provides no structural benefit.
Step 6: Pour and Screed the Concrete
Schedule the concrete delivery for a time when your full crew is assembled and ready. Once the truck arrives, the clock starts. Concrete has a workable window of approximately 60 to 90 minutes before it begins to set, depending on temperature. Start pouring at the farthest point from the truck and work toward it.
Pour the concrete into the forms and spread it roughly to height with shovels and rakes. Do not drag the concrete long distances, as this separates the aggregate from the paste and creates weak spots.
Screed the concrete by pulling a straight board (screed board) across the top of the forms in a sawing motion. This levels the concrete flush with the form tops and pushes excess material ahead. Two people on opposite sides of the slab pulling the screed board together produces the best results.
Fill low spots immediately and re-screed. The screeding step establishes the final grade of the slab. Any imperfections left after screeding will be visible in the finished surface.
Step 7: Finish the Surface
After screeding, use a bull float (large flat tool on a long handle) to smooth the surface and push aggregate slightly below the cement paste. Float the surface in overlapping passes, keeping the leading edge slightly raised to avoid digging into the wet concrete.
Wait for the bleed water (water that rises to the surface) to appear and then evaporate. Do not start finishing operations while bleed water is present on the surface. Working water back into the surface creates a weak top layer that will spall and flake.
Apply the chosen finish once the bleed water has evaporated and the concrete holds a thumbprint without significant indentation. For a broom finish, drag a concrete broom across the surface in parallel lines. For a smooth trowel finish, work the surface with a steel trowel. For stamped concrete, apply color hardener and release agent, then press stamps into the surface.
Cut control joints within 6 to 18 hours of pouring. Control joints should be cut at intervals equal to 2 to 3 times the slab thickness in feet. For a 4-inch slab, cut joints every 8 to 12 feet. Control joints are weak lines cut 1/4 of the slab depth that encourage inevitable shrinkage cracks to form along the joint line rather than randomly across the surface.
Step 8: Cure the Slab Properly
Apply a liquid curing compound to the finished surface immediately after the final finish is applied. Curing compound forms a thin membrane that retains moisture in the concrete during the critical first 7 days of hydration.
Alternatively, cover the slab with plastic sheeting or damp burlap and keep it moist for at least 7 days. This method requires checking and re-wetting the burlap daily. Plastic sheeting traps moisture without the need for rewetting but can cause uneven color if the plastic contacts the surface in some areas.
Keep traffic off the slab for a minimum of 24 hours for foot traffic, 7 days for light vehicle traffic, and 28 days for full design loads. Concrete reaches approximately 70% of its 28-day strength at 7 days and 100% at 28 days. Loading a slab too early risks permanent cracking and surface damage.
After curing, remove the forms by pulling the stakes and prying the boards away from the slab edges. Backfill the gap between the slab edge and the surrounding grade with soil or gravel and compact it.
Frequently Asked Questions
Can I pour a concrete slab myself?
A concrete slab under 100 square feet is a manageable DIY project for someone with basic construction experience. Larger slabs require a crew of 3 to 6 people because concrete must be placed, screeded, and finished within a short working window. Hiring a professional concrete contractor for slabs over 100 square feet produces better results and includes warranty protection.
How much does it cost to pour a concrete slab?
Pouring a concrete slab costs $4 to $12 per square foot in 2026 depending on thickness, reinforcement, and finish. A 10×10 slab runs $600 to $1,200. A 20×20 slab costs $2,400 to $4,800. Material cost for 3,000 PSI ready-mix concrete is $120 to $150 per cubic yard delivered.
What is the best concrete mix for a slab?
Standard 3,000 PSI ready-mix concrete works for most residential slabs including patios, walkways, and shed pads. Use 3,500 to 4,000 PSI for garage floors and driveways. Use 4,000+ PSI for commercial foundations. Specify air-entrained concrete in freeze-thaw climates to improve durability against winter weather.
How thick should a concrete slab be?
A 4-inch thick slab works for patios, walkways, and light storage buildings. Use 5 inches for garage floors and driveways. Use 6 inches or more for metal building foundations and heavy commercial loads. Thicker slabs cost more but have significantly higher load capacity and crack resistance.
Do I need rebar or wire mesh in a concrete slab?
Rebar is recommended for any slab that will support structures, vehicles, or heavy loads. Standard #3 rebar at 18 inches on center provides the best combination of strength and cost. Wire mesh works for light-duty slabs like walkways and patios. Fiber mesh is an alternative for slabs where surface cracking is the primary concern. Reinforcement should sit at the middle of the slab thickness, not the bottom.
How long does a concrete slab take to pour?
The actual pour and finish takes 2 to 6 hours depending on slab size and crew size. A 4-person crew can pour and finish 800 to 1,200 square feet in a single day. Site preparation and forming typically take an additional half day to full day before the pour. The entire project from start to walkable surface takes 2 to 3 days plus 28 days of cure time.
What happens if you pour concrete without gravel base?
Pouring concrete directly on soil without a gravel base leads to poor drainage, uneven support, and eventual slab settlement or cracking. The gravel base provides uniform support, allows water to drain away from the slab bottom, and prevents moisture from wicking up into the concrete. Skipping the gravel base is the most common cause of premature concrete slab failure.
Start Quoting Concrete Projects Today
Use the Metal America Concrete app to instantly quote, sell, and manage concrete pad installations.
Get Started Free